Beginner's Guide to Setting Up a Uniview Surveillance System
Setting up a reliable and effective surveillance system is crucial for any business or property owner looking to enhance security and monitor their environment. With Uniview’s cutting-edge surveillance technology, even beginners can deploy a powerful system that offers exceptional performance. This beginner’s guide will walk you through the steps to set up a Uniview surveillance system, from planning and installation to configuring advanced features and maintaining your system.
1. Plan Your System
Before diving into the hardware setup, the first step is to plan your surveillance system carefully. Consider the following factors:
- Number of Cameras: Determine how many cameras are needed to cover your property effectively. Think about blind spots, entry and exit points, and areas requiring special focus like parking lots or storage rooms.
- Camera Placement: Ideal placement is key to maximizing coverage. Be mindful of lighting conditions (low light vs. bright light areas) and potential obstructions.
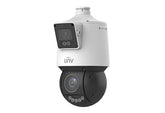
- Need for PTZ Cameras: For larger or more dynamic spaces, consider PTZ (Pan-Tilt-Zoom) cameras, which allow flexible coverage and detailed zoom capabilities.
Uniview offers various camera series to suit different needs:
- Easy Series: Ideal for residential settings or small retail stores, providing excellent entry-level performance.
- Prime Series: Offers advanced features for small- to medium-sized businesses, balancing performance and cost-effectiveness.
- Pro Series: Designed for demanding environments, featuring ultra-smart technology for superior user experience and large-scale deployments.
2. Choose Recording and Storage Options
Next, you’ll need to select a Network Video Recorder (NVR) to store and manage your camera footage. The right NVR depends on the number of cameras, resolution, and storage capacity required.
- Easy Series NVRs: These are perfect for small-scale systems, offering simple management and adequate storage for several IP cameras.
- Prime Series NVRs: With powerful decoding capabilities, these NVRs are suited for small- to medium-sized setups with practical functionality.
- Pro Series NVRs: For large-scale deployments, these NVRs provide high performance, large storage capacity, and flexibility for expansion.
Additionally, if you require edge-based video analytics and storage, Uniview’s Smart BOX offers a powerful solution for enhanced video analysis.
3. Connect Cameras and NVR to the Network
Once you have your cameras and NVR, it’s time to connect them to the network. Use Ethernet cables to link each camera to a Power over Ethernet (PoE) switch or directly to the NVR’s PoE ports (if available). Then, connect the NVR to the network router via an Ethernet cable. Power on all devices.
Troubleshooting Tip: If cameras are not detected, ensure all cable connections are secure, PoE functionality is enabled, and the devices are on the same network subnet.
4. Access the NVR's Web Interface
Now, it’s time to access the NVR’s web interface. On a computer connected to the same network, open a web browser and enter the NVR’s IP address. Refer to the NVR’s documentation to find the default IP address and login credentials.
Troubleshooting Tip: If you cannot access the web interface, double-check the IP address and network connectivity. Consult the NVR user manual for troubleshooting steps.
5. Configure Basic Network Settings
Once logged in, assign a static IP address to both the NVR and each camera. This ensures stable network communication. Also, change the default passwords for both devices to strong, unique passwords for enhanced security.
Troubleshooting Tip: If you experience IP conflicts, ensure the static IP addresses are unique and fall within the network’s subnet range.
6. Enable and Configure Smart Features
Uniview cameras offer a variety of smart features to enhance security, including:
- Motion Detection
- Intrusion Detection
- Face Detection
- People Counting
- Automatic Tracking
- Smart Intrusion Prevention
- Line Crossing Detection
- Area Entrance/Exit Detection
Depending on your security needs, enable and configure these features to provide enhanced surveillance and more proactive monitoring.
7. Optimize Camera Image Settings
Optimize the image settings for each camera based on lighting conditions and the desired clarity. Experiment with settings such as brightness, contrast, sharpness, and noise reduction. If you’re using Uniview’s LightHunter technology, adjust settings to ensure excellent performance in low-light conditions.
Troubleshooting Tip: In low-light areas, consider using LightHunter cameras and adjust settings to maximize performance. Ensure IR illumination is enabled for optimal nighttime visibility.
8. Set Up Recording Schedules
Configure recording schedules on the NVR to determine when and how cameras record footage. You can set cameras to record continuously, only when motion is detected, or on a specific schedule.
Troubleshooting Tip: If recordings aren’t being saved, verify the recording schedules, ensure the storage drive has sufficient capacity, and check the health of the hard drive.
9. Install and Configure EZStation Software
For enhanced monitoring and management, install the EZStation VMS (Video Management Software) on a computer. This software allows you to view live footage, playback recordings, manage alarms, and create custom views. Add your NVR and cameras to EZStation to start managing your surveillance system effectively.
Troubleshooting Tip: If you encounter issues adding devices to EZStation, confirm the network connectivity, check IP addresses, and ensure the firmware is compatible with the software version.
10. Regularly Maintain the System
To ensure your Uniview surveillance system performs optimally over time, perform regular maintenance tasks:
- Clean the camera lenses and housings.
- Check and secure cable connections.
- Ensure adequate ventilation to prevent overheating.
- Review camera settings and smart features to adjust for evolving security needs.
Additionally, keep the system’s firmware updated to benefit from security patches, new features, and performance improvements.
Conclusion
By following this beginner’s guide and utilizing the troubleshooting tips provided, you can confidently set up and manage your Uniview surveillance system. With careful planning, the right camera models, and smart features, you’ll not only enhance security but also gain valuable insights into your environment. Whether you're securing your home, small business, or large enterprise, Uniview’s user-friendly solutions offer everything you need to create a comprehensive and reliable surveillance system.


